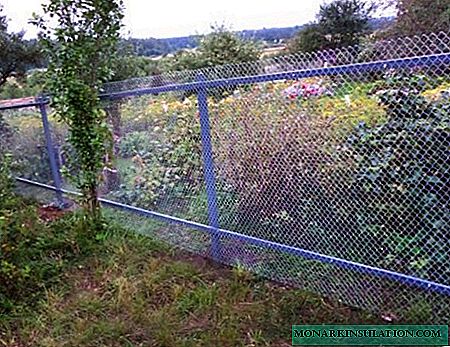
In some country cooperatives between the sites it is impossible to install a fence of slate and other materials, because they greatly obscure small areas. In this case, a good exit would be a fence from the netting net - it does not prevent the sun from entering the area, it does not impede the natural circulation of air. Rabitsa is an inexpensive material that can last a very long time. Its additional plus is the ability to use as a support for climbing plants. The author of this successful invention was Karl Rabitz. The grid began to be used already at the end of the 19th century, it was originally used during plastering.
The chain-link is an accessible material that any owner of a summer cottage can afford. In order to create a fence from a chain-link with your own hands, in addition to the mesh, you will need thick wire, reinforcing bars, a cable and support posts.

The fence from the chain-link can be a wonderful hedge, serve as a support for climbing plants. In this case, the site will be much more beautiful
Today, manufacturers offer three types of mesh netting:
- non-galvanized mesh is one of the cheapest, it is better not to consider this option, because after a few months, it may become rusty;
- galvanized chain-link is found most often - at a price it is slightly more expensive than non-galvanized, but it does not rust;
- plasticized netting - a metal mesh that is coated with multi-colored polymers on top for protection against corrosion.
The latter option is very practical, and such a grid looks much more aesthetically pleasing than a metal one. Therefore, plasticized netting, although it has appeared recently, is already actively used by our gardeners.
When choosing a mesh, attention should be paid to the size of the cells; the smaller their size, the stronger and more expensive the mesh. A grid with cells of 40-50 mm and a roll width of 1.5 m is quite suitable as a fence for a summer cottage.
Option # 1 - “tension” fence from the netting
The fence device from the mesh netting can be different. The easiest way to make a fence is to stretch the grid between the posts. Poles can be used metal, wood or concrete.

An easy way to make a tension fence from a chain-link without the use of rods - the grid is stretched between the posts and hung on hooks. Of course, over time it can sag, but such a fence can last a long time.
The number of posts depends on the distance between them and the length of the fence. As practice shows, the best distance between the posts of the fence made of metal mesh is 2.5 m. As columns, you can use used pipes that are not affected by corrosion. Now ready-made fence posts, already painted, with hooks, are also for sale. Wooden poles need to be treated with a protective compound along the entire length before installation. You can use concrete poles and attach a grid to them with wire or a clamp.
Related article: Installing fence posts: mounting methods for various structures.
The height of the columns is calculated as follows. With a clearance between the ground and the fence, add 5-10 cm to the width of the grid, and then another meter and a half, taking into account the underground part. As a result, you will get the average column height required to install the future fence. The load on the corner posts will be slightly larger, they should be dug deeper, therefore, their length should exceed the length of ordinary posts by about 20 cm.
The bases of all pillars are better concreted for greater strength. The pillars are the frame of the fence, after you install them, you can begin to fasten the grid. After the concrete has hardened, hooks for attaching the mesh are attached or welded (if the column is metal) to the posts. Screws, rods, nails, wire - any material that bends into a hook is suitable as material for fasteners. We straighten the roll with the grid and install it at the corner post, hang the grid on hooks.

To ensure good tension and structural strength, vertically weave a rod or a thick wire in the first row of mesh cells, attach the rod to a wooden pole or weld to a metal one. The mesh fixed in this way will not bend or sag, as is often the case without such an attachment
Then the roll is unwound to the span, to the next pillar. A little further than the place where the grid connects to the column, we thread the rod in the same way. We hold on to the rod and stretch the net, if you do not use the rod and pull it by hand, you can stretch the grid unevenly. It is best to do this together - one person at the bottom edge, the other at the top.
Now reinforcement is threaded horizontally at a distance of at least 5 cm on both edges, above and below. Horizontal rods are welded or attached to poles. If you pull the net without rods, it will sag over time, and the rods will maintain its tension.

The scheme of the fence device made of galvanized wire with broaching reinforcement on the upper and lower sides. Such a fence is a stronger structure
In the same way, we proceed further - we stretch the mesh, fix it, stretch the wire or rod, fasten or weld.
The fence is almost ready, now you need to bend the hooks on the poles and paint the posts. Sticking out wire "antennae" is better to turn down so that no one is injured. It is convenient to pass the wire through the top row of cells and wrap the protruding edges around it.

Here the “antennae” is neatly bent down to the rod, things can be dried on such a fence, there is no risk of injury

The “antennae” of the upper cells must be bent to avoid accidental injuries. In this photo they are slightly bent - there is a risk of injury or tearing clothes
If you do not want to use reinforcement and concrete columns, you can use the simplest technique presented in this video:
Option # 2 - erection of a fence from sections
For the manufacture of this type of fence you need sections where it will be mounted mesh. Initially, similar to the device of the tension fence, marking is made and poles are installed.

This scheme can be taken as a basis for determining the proportions of the dimensions of the future structure (click to enlarge)
It will be necessary to buy a corner measuring 40/5 mm for the manufacture of the frame. The length of the frame is determined in this way: from the distance between the posts we subtract about 10-15 cm - this is its length. Subtract the same amount from the height of the column above the soil level - the resulting amount is the width of the frame. Corners are welded into rectangular structures. You can make the size of the sections based on the mesh size (1.5-2 m), you can unwind the roll and, if necessary, reduce the mesh size to the desired grinder.
Then strips of metal are horizontally welded to the posts (length 15-25 cm, width 5 cm, cross section 5 mm). At the edges of the column, you need to retreat 20 cm, install a section between two columns and, using welding, attach it to horizontal stripes. Now it remains only to paint a new fence.

Rods with a cross section of 4 mm are threaded through the mesh from 4 sides, first in the extreme row, then from above and below, the mesh must be pulled well and the rods welded to the corners of the section. (The rods are welded to the horizontal corners). It turns out a section from the corner with a mesh netting welded to the rods from the inside

On the inclined section, it will not be possible to make the tension fence; in the inclined position, the mesh cannot be pulled. For an inclined section, you can make a sectional fence, installing on both sides of the pillars of the section at different distances by soil level.
Each owner familiar with welding can make a fence from a chain-link grid on his own. As a rule, 2-3 people cope with work in a relatively short period of time. Go ahead!

