If you want to diversify the design of a suburban area with an original garden path or path, and the products offered in the supermarket do not suit you for any reason, take a chance and create a tile yourself, literally from improvised materials. To do this, you need to purchase special plastic molds and learn how to prepare a solution for garden paths. Add a little imagination, building skills, patience - and your path will turn out not only durable, but also amazingly beautiful.
How to make inexpensive and beautiful?
Now it’s easy to find everything to do individual creativity. In stores you can buy convenient plastic mold stencils for making tiles. You prepare a cement mortar, pour it into a mold - and after a few days you get a tile of a given color that mimics the factory analogue for the sidewalk.

Solid, colorful, colorful paths look great in the garden, between flowering trees and flower beds, and on a green, neatly trimmed lawn, and among garden beds
Paths made of strong concrete tiles can last for decades - in terms of strength they are not inferior to the foundation of the building or the overlap of a small bridge. They are convenient and functional - and all thanks to properly prepared cement mortar.

A solid solid form costs about 1200 rubles, and a lightweight version - a stencil with cells of various shapes - is much cheaper. Depending on the material, its price ranges from 50 to 250 rubles
Many skilled craftsmen prefer their own creations to the purchasing option, therefore they make forms on their own using wooden blocks or a metal profile.

From short planed bars, you can make a rectangle, square, lattice or small hexagon, which will serve as a mold for pouring cement mortar
How to make a cement mortar?
The ability to independently prepare a cement mortar at home will be useful to anyone who plans to do construction or repair work. An adhesive mass that hardens over time is necessary for laying bricks, for creating stone decorative compositions, and even for closing a hole in the wall.
For the construction of garden paths, you need a regular solution that you can prepare yourself. However, its functional qualities largely depend on the preparation of the material and proportions, so we will consider in detail how to fill molds for garden paths so that it serves for many years.
What needs to be prepared?
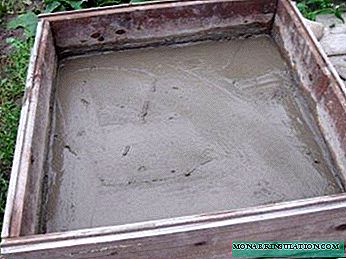
It is possible that someone in the country’s possession will have a mobile concrete mixer (in this case, the process of preparing the mass will take place more efficiently and quickly), but it is unlikely that this useful aggregate can be found in the average gardening industry, so we will collect the arsenal from what is constantly located at hand.
It is very important to choose the right container, which would be suitable both in size and in the convenience of working with it. Ideally, the volume of the tank should correspond to the portion of the solution that you want to cook in one go. Too small capacity will force you to repeat the procedure - and this is an increase in time spent on work by 2 times. In a large bowl it is inconvenient to mix the components and create a homogeneous mass. Also important are tank qualities such as stability and wall strength.

For small volumes of cement (if you will make tiles slowly, for example, on weekends), a small container made of durable plastic with low sides
If you have an old cast-iron bathtub in your country house, which is usually used for storing rainwater, it can be an excellent temporary option for diluting cement mortar, or other large dishes that meet the above requirements.
In addition to the capacity, a tool is needed to stir the mass to a homogeneous state. It is a mistake to use a shovel or a wooden block - the solution will be lumped, which will affect the poor quality of the tile.

The best equipment is a construction mixer or, as it is also called, a hand mixer; in its absence, you can use a drill with a special nozzle
Try to put everything in one place, so that during the cooking process you do not have to go away and drag out the process.
Component Selection
For a standard, widely used cement mortar, 3 components are needed: cement, sand and water. It would seem that everything is simple - I mixed everything together and got excellent material for pouring into molds. However, there are several important points, non-compliance with which will immediately affect the quality of the tile. For example, sand. You can find several types of sand, which differ in particle size, weight, and composition.

We will use ordinary quarry or river sand with characteristics such as cleanliness (for this it needs to be washed), uniformity, and no impurities
Cement - dry mix in paper bags - must be friable, fresh, with an expired shelf life. If a couple of bags from a construction site 10 years old are stored in your utility room, it is better to say goodbye to them, because you cannot get a good solution from such cement.
Here are some tips from professional builders to help you make a great solution:
- If you notice small lumps in the dry mixture, it is better to sift the powder using a special sieve (10 mm x 10 mm cells are sufficient for working with stone, but for plastering a sieve with 5 mm x 5 mm cells is required).
- The best type of cement for outdoor work is 300 or 400 grades.
- Correctly determine the proportions of all three components. For tracks, the traditional 1: 3 ratio is ideal, where 1 part of cement accounts for 3 parts of sand. Bulk materials can be measured in buckets or other suitable containers.
- To give a certain shade or change some characteristics (viscosity, strength), modern components, for example, plasticizers or colored granules, are added to the solution.
When preparing the solution, make sure that it does not become oily, that is, containing a lot of binder component. The fat mass is plastic, convenient for application, but forms a composition that quickly dries and cracks over time - this is not suitable for garden paths. With a lack of a bonding element, we get skinny cement that will harden for too long and also have inappropriate characteristics.
We need normal cement, after hardening, having excellent strength and wear resistance, and for this it is just necessary to observe the proportions.

A bag of cement weighing 25 kg costs from 180 to 250 rubles. The price depends on the manufacturer, brand and quality of the dry mix
Water is added "by eye", first a little, then added in small portions. The result should be a mass resembling a thick sour cream in viscosity.
Cement Mortar
Keep in mind that the finished solution can be used for several hours, then it will be unsuitable for pouring, so pre-prepare the table, forms, stencils - all that is necessary for the production of road tiles.
Cement and sand are poured into the container in thin layers - at least 5-6 layers should be obtained. This is necessary for high-quality, uniform mixing of the components. Stop when the total height of the “pie” reaches 25-30 cm. Then take a shovel and try to gently but intensively mix the components of the mixture: the more actively you move the shovel, the better the future solution will be.

The homogeneity of dry cement mortar can be determined by eye. If in doubt about the purity of the mass - again pass through a sieve
Water can be added only after you make sure that the dry mix is completely ready, or rather, its uniformity. It is better to take a small container and add in small portions so as not to overdo it and not make the solution too liquid. Pour in water slowly, stirring slightly.
The mistake of novice builders is experiments with the temperature of the fluid injected. Some people think that hot water will speed up the breeding process, and they specially heat it, others pour in ice-cold liquid. Both are incorrect and can negatively affect the quality of the solution. Water should be at the same temperature as the surrounding atmosphere - in our case, of course, we are talking about the warm season.

The ready-to-use mixture for pouring molds should turn out to be a little more liquid than cement mortar for bricklaying
Another nuance concerns the humidity of the sand. Often use sand stored directly on the site. Obviously, during the rain he could get wet. If you use wet, heavier sand, pour even less liquid. Is the solution ready? Proceed to fill. Depending on the density and viscosity of the composition, you have 1-3 hours to pour the solution into molds.
Cement-based mosaic tiles: detailed photo instruction
Not everyone likes boring gray paths, reminiscent of urban paved streets or concrete, so we offer you the process of manufacturing tiles, conventionally called mosaic. Our tile is far from the masterpieces of Spanish or Italian professional masters, however, beautiful smooth squares with an ornament of multi-colored stones against a background of garden greenery look simply magnificent.

The size of the tile depends on your garden path design. Large, with a side of 50 cm, can be laid in one row - you get a narrow path, small (30-40 cm) - in two or three parallel rows, or even randomly
Unlike ordinary tiles, consisting of one cement mortar, our option implies the presence of an additional "weighty" component - stones. They can be large or small, one-colored or multi-colored, round or flat. Stones can be replaced with fragments of ceramic or tile, pebbles - the main thing is that they do not slip during rain.
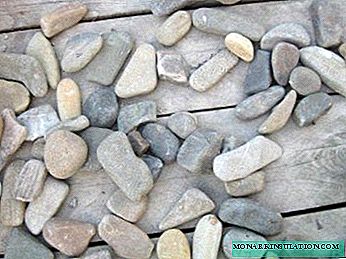
Multi-colored stones for tiles were taken on the banks of a nearby river. If you are not lucky with the ponds or just the riverbanks turned out to be sandy, do not worry - the stones of the necessary fraction can always be purchased at one of the construction companies
The basis for the tile is a cement mortar prepared according to the standard scheme described above. We take the classic formula: for 1 part of cement 3 parts of river sand. We prepare the mixture in a large container using a small plastic measuring container.
It is also possible to dilute the solution in batches, separately for each tile, but this process will be very long and laborious, therefore we prepare the solution in an amount that is enough to fill 6-8 pre-prepared home-made forms.

The forms have a simple design and are drawers with low walls formed by planks 30-50 cm long. The thickness of the prepared tile can be from 5 cm to 15 cm
Carefully fill the solution with a mold covered with a plastic film lubricated with oil (a used machine will do). To the tiles were the same thickness, we put an equal amount of cement mixture. For accuracy, you can draw lines along the edges of the boards indicating the height of the tile.
We carefully level the surface of the cement mortar - we prepare it for laying stones. It is important to maintain the necessary consistency of the mass, since the stones will fall into too thin a solution
Without waiting for the solution to set, lay the stones on the surface. Even before preparing the solution, you can conduct a kind of rehearsal by laying out the stones in the drawer “on dry” to find out the approximate number of stones needed for 1 tile.

You need to start from the corners - this way the tile will be stronger, and the stone pattern - more clear and correct. If you use stones of various sizes, then try to lay larger ones around the perimeter
We continue to stack stones alternately, creating a natural or geometrically correct pattern. You can alternate elements of different sizes or different colors.

Spreading the perimeter, we try to ensure that the long side of the cobblestones lies along the edge. This will prevent the base from breaking off after long use and extend the life of the garden path.
First, lay out larger stones, then fill the empty spaces with small ones. The result is a beautiful multi-colored tile, the appearance is not inferior to the factory counterpart.

On the sample, the stones are laid out in a natural manner. There are other options - in a checkerboard pattern, in a spiral, in rows along the diagonal, herringbone, etc.
The protruding elements are the shortened life of the tile and grief for those who will walk on it, so we carefully push all the stones inward so that their upper planes are aligned with the concrete base.

For leveling the surface and tamping stones, we also use an improvised tool. In this case, we needed a construction trowel left after plastering
So, all the active work on creating the tiles is finished, it remains to wait. So that the concrete does not become cracked, it must be moistened 1-2 times a day. After 3-4 days, it will ripen, the hardened material will move away from the walls of the formwork, and the tile can be removed, freeing the mold for the next portion of the solution.

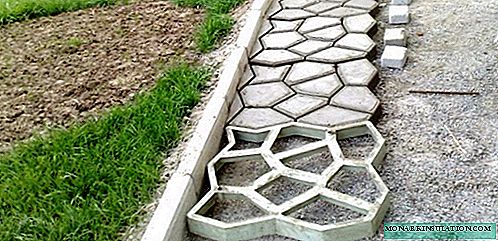
The finished tile can immediately be put in place. Usually this is a prepared base - a sand-gravel “layer cake” lined and fenced with borders
Tiles are suitable for the construction of paths or sites of any size and shape.

Concrete mortar is useful not only for pouring into molds, but also for creating an integral coating from individual tiles - for this it is necessary to fill the joints between the tiles with cement mixture or use it as glue
The track, which spent a minimum of budget funds, looks amazing, especially if there are still structures on the site made of stone and cement mortar.

Magnificent wrought-iron gates and a high stone fence are the perfect backdrop for a garden path made of river stones. And note - everywhere not the last role is played by ordinary cement mortar prepared with one's own hand
And finally - a great video on how to properly prepare a cement mortar and pour it into a tile mold: