Growing cherries from seeds does not allow to reliably maintain varietal characteristics. Therefore, gardeners prefer vegetative methods: they separate the root shoot, root cuttings, plant. But sometimes seed propagation is indispensable. For example, you need to get a plant that is well adapted to local conditions, you want to create a bonsai or get a rare variety, and other methods of reproduction are not available.
How to plant cherry from a stone: step-by-step instruction with a photo
The process of growing one of the most delicate fruit crops of the Russian garden from seeds involves the following simple steps:
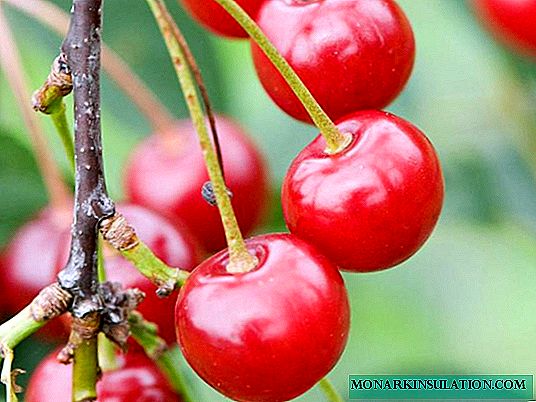
- Select the most ripe, beautiful, large berries.
- Remove the flesh from the pulp, rinse with water, then with a pink solution of potassium permanganate, and dry in a shaded place. In the photo below, the bones are cleaned of pulp using a simple device - a bone ejector. Mistresses are well acquainted with him, who prefer to harvest seedless cherry jam.

It is most convenient to extract the seeds and keep the berries as whole as possible with the help of a stone pusher
- Mix the bones with wet sand, put in a cool place. Here they will be located from late August to October.
Attention! Most often, only building sand is available to city dwellers, but it is undesirable to take it. It differs from the river in the absence of the necessary friability, water and air permeability. When moistened, it sticks together, blocking access to air. In such sand there is a high probability of spoilage. Coarse river sand should be taken. It is also called quartz.
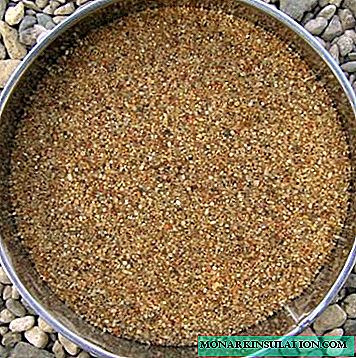
River or quartz sand is the best substrate for storing seeds
- In October, sow into the ground by digging 3 cm deep.
- During the winter, the bones are naturally stratified.
- Shoots will appear in the spring.


This method has its drawbacks - it is difficult to control the process. This method is not suitable for those who have only a few seeds of a particularly valuable sort of cherry. Also, it is not suitable if the region has unstable frosty winters with weak snow cover - nevertheless, the cherry culture is quite tender. Some cherries, for example, the Troitskaya variety, reproduce well by self-sowing in Siberia. But in such cases we are talking about seeds obtained from a tree already adapted to the difficult conditions of the region.
Therefore, you can save the cherry pits until December, and then stratify artificially. During storage, observe the necessary humidity and temperature - up to 20 ° С. Bones should be inspected periodically for damage and mold. You can mix them not only with sand, but also with peat, and with moss, and with sawdust - any loose material, the main thing is that the bones do not dry out, and at the same time are not damp. Of course, it is optimal to plant stone fruits immediately after they have been eaten, but this is not always possible. It is important not to overdry them - this is one of the common reasons that seeds do not germinate at all. It is enough to dry the bones slightly, and then immediately place them in the desired substrate. Keeping the bones dry is not recommended - they sprout worse. There is such a thing - post-harvest ripening of seeds. Cherry bones, like many crops that have to endure a long winter, also have the ability to ripen, so sowing dry seeds before winter is a mistake.
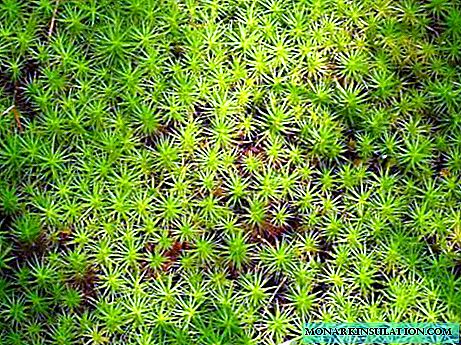
Moss Sphagnum grows everywhere in mixed and coniferous forests, but you can buy it
Instructions for growing cherry pits for those who want to control the process look like this:
- Take the seeds from frozen cherries intended for defrosting in early March, or simply store the seeds until this time in the refrigerator. Thus, the bones will already be stratified.
- In March, place the seeds in coarse (river) sand or wet sawdust. Cover with glass, put in a bright place. Heat is unusual for cherry pits, find a cool window sill with a temperature of 15-20 ° C
- Periodically, the crops should be aired and moistened.
- After two months, the seeds will sprout.
- Now they can be sorted, the most powerful ones can be planted several in the holes prepared in the garden, or in the pots. The cracked stone with the main root that appears is laid on its side, sprinkled with soil so that it is not visible, and after a couple of days they remove excess soil, exposing the stone by two-thirds. Or you should immediately half-dig. It is important that the root "understand" that it needs to grow down, but the bone can be observed.
This method is more convenient in that you can immediately select the strongest plants and plant them in a permanent place.

A young, just sprouted cherry plant with cotyledons and two true leaves
Below, we consider two of the most important stages in growing cherry from seed: what other stratification options are there and how to accelerate germination by correctly processing the seed.
Preparatory work: bone treatment
The faster the seed bursts, the faster the plants will sprout. Therefore, to speed up the germination of stone seeds (apricots, peaches, cherries), a lot of techniques are used. The hard shell is thermally, physically, chemically affected. The easiest way to accelerate the germination of cherries is to soak the seeds in water for several days before stratification. Water must be changed often. After 4-5 days, they begin stratification.
It was also noted that temperature contrast affects the acceleration of germination. The higher the takeoff between the highest and lowest temperatures, the faster the seeds wake up. The popular treatment of seeds with boiling water is based on this observation. Seeds are laid out on the mesh material and poured with boiling water, they are exposed to the shock of temperature for just a few seconds.
High temperatures can be useful if the seeds were acquired late, for example, in the spring, and there is no time for long-term stratification of seeds. Before emergence of shoots it is necessary to allocate a month. And before this, contrast presowing preparation is used. Bones should be soaked in warm water, keep them in it for 3 days, periodically changing the water. Then stand for 20 minutes in a pink solution of potassium permanganate. Then you need to put the bones in the freezer (temperature -6C) for 1.5-2 hours. After that, take out the bones, transfer to a warm room, pour water at about 50-55 ° C (warm for the hand). If the bone does not crack, repeat the procedure. Now you can sow seeds and wait for germination.
Scarification is a mechanical effect on a hard shell. Usually it is carefully filed with a file so that it is easier for the plant to break the barrier. You can try to pierce. In nature, the shell becomes thinner under the influence of a mass of factors - moisture, temperature changes, bacteria. Such a long and varied exposure without the risk of mold is not always possible at home. Just keep in mind that scarification does not negate stratification and the entire landing sequence. To wake up the embryo and stimulate its growth, temperature dynamics is needed, and scarification only simplifies its exit. Perform scarification prior to stratification and soaking.

Hard File Scarification
Stratification of cherry seeds - the most important stage of germination
Stratification is required! Cherry refers to garden plants whose seeds are going through a phase of deep dormancy. In such seeds, seed embryos are not only protected by a strong, little susceptible to natural destroyer shell, but are exposed to special substances that slow down the maturation of the embryo. Natural wintering is a signal for them to gradually prepare for germination - substances that, on the contrary, stimulate growth begin to be produced. Once the amount of these substances reaches a certain level, the seed sprouts.
If it is impossible to place cherry bones on the street, they arrange an artificial wintering.
The treated bone is mixed with a loose substrate. It can be sawdust, moss, sand, vermiculite, peat, or mixtures thereof in any proportions. Some take the finished soil for cacti. Nutrition is not yet required from the mixture, its mechanical properties are important - it must be loose, well permeable to moisture and air. The mixture with stones is placed in a container, preferably transparent, covered with a lid in which several holes have been made previously, put in the refrigerator for 2-3 months (4-5 ° C). Be sure to regularly inspect - at least 1 time per week. Although it all depends on the microclimate and the source data of the substrate - you can forget about planting all winter, and neither mold nor fungal diseases will affect the planting material. If nevertheless the first signs of mold are found, the bones should be removed, washed, treated with potassium permanganate, planted again in a sterile substrate.
This is a variant of dry stratification. After it, the seeds are soaked and sent for germination. But a variant of wet stratification is also possible - the soil with stones is slightly moistened, and then they are already refrigerated. Which method is better is a moot point. For seeds of apple trees and apricots, the scheme “long dry wintering + subsequent soaking” gives really excellent results: already on the seventh day, the hard shell of the apricot bursts and sprouts begin to appear. An obvious plus of the dry method is less risk that the bone will begin to rot. On the other hand, wet stratification is closer to natural conditions and, presumably, such bones will sprout faster. There are no experienced reliable studies on this subject.

Seeds in plastic containers prepared for stratification in the refrigerator
In what land to plant a bone
The optimal soil for planting cherry seeds is the one in which the mother tree grew. In its absence, you can use nutritious store soil for growing seedlings. For the germination of cherry seeds at home, small pots, not more than 0.5 l, are suitable. If there are a lot of seeds, they can be planted in plates, observing a distance of at least 20 cm when planting.
Bones must be buried in the soil by 2-3 cm. To maintain moist conditions, planting is covered with a plastic bag and placed on a light, cool window sill. Regularly ventilate and inspect. Bones germinate in a month. If you planted seeds with a cracked shell, then they can germinate within a week after planting.
If we are talking about growing sakura (finely sawn cherry), then the choice of soil is approached more carefully. The soil should be capacious, nutritious - humus, nitrogenous and potassium fertilizers make.

Fine-sawn cherry or sakura shaped like a bonsai
Sprout care
If the seeds were sown immediately in the open ground, then after emergence in the spring they will require standard care, as for seedlings obtained by vegetative methods. The near-trunk circle is loosened, watered, plants are examined for pests, weeds are removed. By autumn, seedlings can grow up to half a meter. Now they can be transplanted to a permanent place.
If the plant is planted in a pot, they look for a very bright, not hot place, protected from drafts. Indoors, regular wet cleaning is required.
Watering is best ... with snow. Melt water has a special purity and structure; it has not yet absorbed salts and heavy elements from the earth. Fresh snow is spread on the ground without touching the sprouts.

For watering young seedlings, clean fresh snow is best.
Fertilize young plants if they are planted in nutrient soil, there is no need - on the contrary, there is a risk of overfeeding. Only potted plants are fed 2 months after planting, but in this case there are no general recommendations for top dressing - it all depends on the goals of the cultivation and the initial data (formation of bonsai, growing for the purpose of transplanting to a permanent place, pot size, soil nutrition, well-being of plants )
Felt Bone Cherry
Felt cherry inherits characters well during seed propagation, so it is often grown from seeds. This method allows you to get calibrated, aligned and highly adaptive plants. The seed germination is almost one hundred percent - of 10 seeds germinate 8. The principles of planting do not differ from those described above. Detailed step by step instructions:
- The most healthy plants, with large fruits and high yields, are selected in advance.
- Collected seeds are sown in autumn in fertile light soil 45-60 days before the onset of frost.
- For sowing in the spring store, stratify and germinate, as described above.
- Part of the seeds germinate faster. To stop their growth and get friendly shoots, a container with bones is dug in the snow. Keep at a temperature of 0 ° C until the time of sowing.
- Prepare the soil: per 1 sq. Km. m. - 10-15 kg of humus, 40 g of double superphosphate, 20 g of potassium sulfate.
- Make a groove. Seeds are laid nearby at a depth of 2-3 cm.
- Sowing is mulched with a thin layer of humus. No more than 1 cm.
- Shoots will appear within 2-3 weeks.
- As soon as 3 real leaves appeared at the seedlings, they are thinned out for the 1st time, leaving the strongest plants.
- The second time thinned out when 4-6 leaves appear. As a result, at least 6 cm should remain between the seedlings.
- Standard care - weeding, loosening. Some recommend a double top dressing per season.
- By autumn, seedlings will reach 60-70 cm. They can be planted in a permanent place.
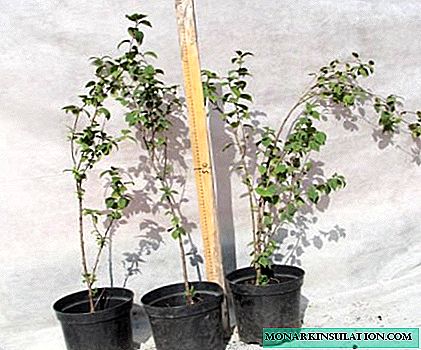
Two year old felt cherry seedlings

The weakest plants are grown at the same place for another 1 year, and transplanted to a constant only next fall.
Young cherries grown from seeds are looked after the same way as trees obtained by other methods. The only difference is that the trees will bear fruit for 3-4 years, not 1-2, but the loss of time will pay off. Cherries obtained by the seed method are much more likely to take root even in difficult conditions, reach maturity and bear fruit all the time allotted to them - 30-35 years.